Allows you to add a new task. After you select the command, the Add Task dialog box displays, allowing you to select the following tabs to create a task:
Save and exit
Save the task and close the editor
Cancel
Close the task editor without saving.
Save
Save the task. Then you can continue editing.
Move Step Up
Select an action in the Action List and click ![]() to move the action up in the list. This ensures the action runs earlier in the process when the task runs.
to move the action up in the list. This ensures the action runs earlier in the process when the task runs.
Move Step Down
Select an action in the Action List and click ![]() to move the action down in the list. This ensures the action runs later in the process when the task runs.
to move the action down in the list. This ensures the action runs later in the process when the task runs.
Record a macro
In order to record mouse actions "as is" click this button ![]() . Macro recorder catches mouse actions and saves them as a sequence of task actions.
. Macro recorder catches mouse actions and saves them as a sequence of task actions.
Use ESC to close
Button – switch:
On: ESC closes the current window. If there is unsaved data, the editor will ask you to save it.
Off: Pressing ESC is ignored.
Save & debug
Saving the current task and starting it immediately in the task debugger.
Task name
Enter the name of task
Active
If the check box is cleared, the task is disabled and you must run it manually by double-clicking the task in the RoboTask window.
Tip
To change the Active setting, select a task in the RoboTask window and right-click.
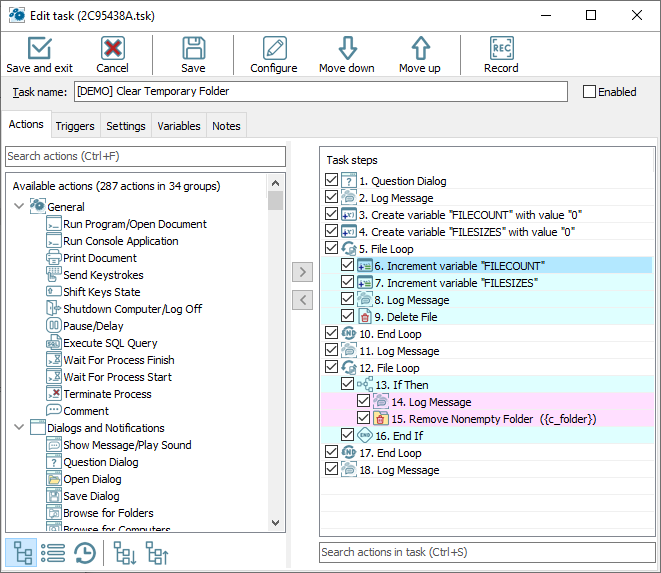
Available actions
List of available actions that you can use in the task.
Task steps
Displays a list of the actions you have selected for the task you are creating or modifying.
To add step select the action from available actions and click the add button ![]() . You can also drag the desired action to the list of steps.
. You can also drag the desired action to the list of steps.
Select an action in the task steps and click the configure button ![]() to modify the action parameters.
to modify the action parameters.
To remove step select the step from task steps and click the remove button ![]() . You can also drag the desired step back to action list.
. You can also drag the desired step back to action list.
When you start the current task, the actions run in the order in which they appear in this list.
Click the ![]() &
& ![]() buttons to move an action up or down in the order listed.
buttons to move an action up or down in the order listed.
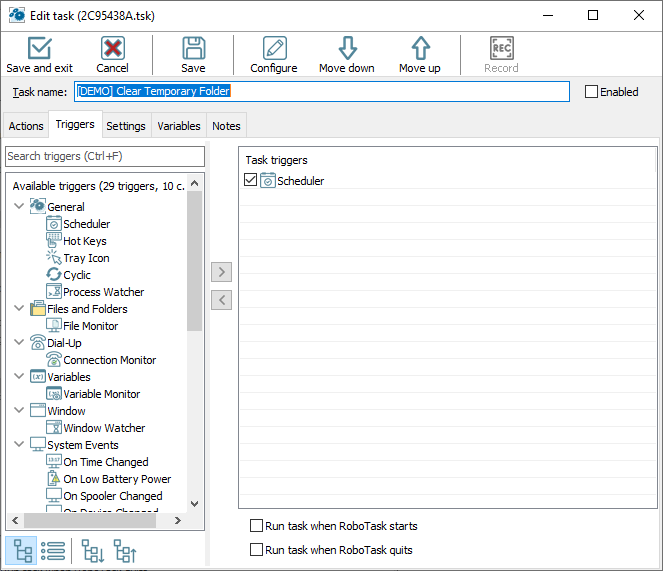
Available triggers
List of available triggers that you can attach to the task.
Task triggers
Displays a list of the events you have selected for the task you are creating or modifying. The order in which events appear in the list does not matter.
To add trigger select trigger from available triggers and click add button ![]() .
.
Select trigger in the task triggers and click the configure button ![]() to modify the trigger parameters.
to modify the trigger parameters.
To remove trigger select the step from task triggers and click the remove button ![]() .
.
Run When RoboTask Starts
If this check box is selected, the task will run automatically when RoboTask starts.
Run When RoboTask Quits
If this check box is selected, the task will run automatically when RoboTask quits.
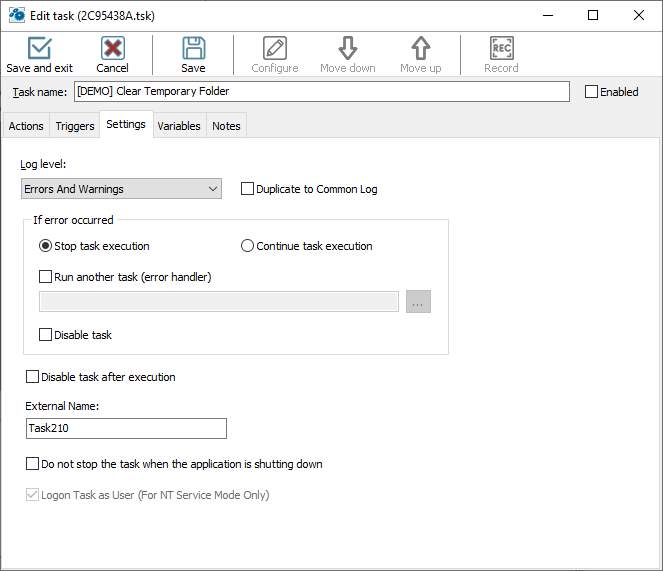
Log Level
Select the status messages you want to record in the log file:
•Nothing
•Errors Only
•Errors and Warnings
•All Messages
If Error Occurred
Here you can define the behavior of a task when an error is raised in any step. You can choose from 3 variants:
•Stop Task – the default action. When an error is raised, performance of a task is stopping.
•Continue Execution – when an error is raised, performance of a task is going on. In other words – it is ignoring of the error. We recommend to use this mode only if it is really necessary.
Run another task (error handler)
Run the other task if an error is raised. The current task itself is an error handler. See below the describing of the transferred parameters.
Error Handling Task
Choose the task of error handler in a drop-down list. This task will be started up in case of appearance of error. When the task is being started up, the fixed kit of parameters is transferring to it:
•LastErrorTaskID – the internal ID of the task, in which an error was raised. It is a formal identifier of the task like a number.
•LastErrorTaskName - the name of the task, in which an error was raised.
•LastErrorTaskExternalName – an External Name of the task, in which an error was raised.
•LastErrorStep – the number of the step (starting from 1), in which an error was raised.
•LastErrorCode – code of the error. There is the own kit of codes of errors for any type of actions (see description of actions). By default – 0.
•LastErrorDescription – the description of the error. It depends on a type of action. By default, it is the line "General error".
LastErrorCode and LastErrorDescription depend on a type of action. Descriptions of error codes are put into the help of actions (help file)
Disable task after error
Enable this option if you want to disable the task when an error occurs.
Disable task after execution
Enable this option if you want to disable the task after completion anyway in any case.
External Name
You can define an external name by hand. External Name is, per se, an alternative identifier of a task, which can help you to refer to a task (see object RoboTaskApp). RoboTask controls the uniqueness of the External Name and, in case of name clash, resets it to the default value. The default value looks like TaskNNNN, where NNNN – is just an ordinal number.
Do not stop the task when the application is shutting down
RoboTask tries to complete all tasks on exit, if they are running at that moment. But for some tasks it is important that the algorithm is executed completely. In this case, enable this checkbox. When you exit, RoboTask will wait until this task is completed.
Restrict REST API access
If you want the task to become "invisible" to the REST API, then enable this checkbox. In this case, the REST server will ignore requests to this task.
Pause between steps
By default, task steps are executed without pause. But sometimes it is useful to keep some pause between steps. For example, if you use some interactive actions. In this case, you can set the pause in milliseconds
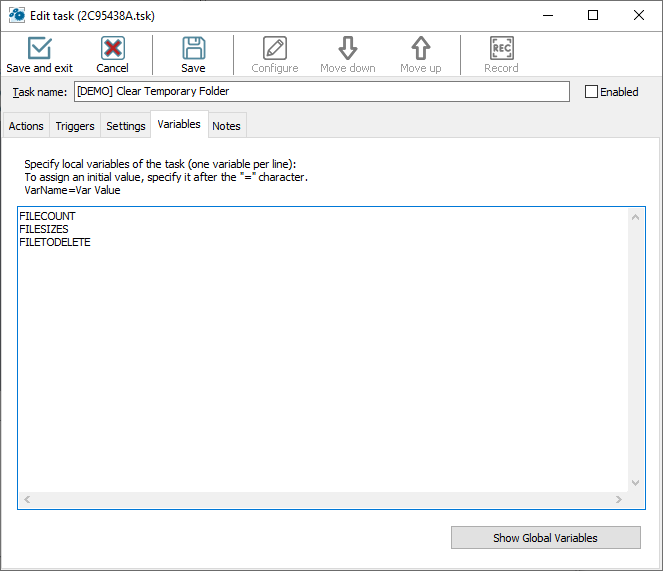
You can declare local variables on the "Local variables" tab of the task editor. There are two ways to declare them:
Enumerate the names of the variables;
Assign initial values to them.
If you enumerate them, just fill the list of names for local variables: one variables per line. For example, like this:
LineCount
FileToUpload
CurrentFile
and so on.
To assign an initial value, specify this value after the "=" character. For example, like this
LineCount=0
FileToUpload=c:\incoming\list.txt
CurrentFile=note.txt
etc.
You can assign initial values not to all variables. By default, local variables contain an empty value (an empty string).
By default, the list of local variables is empty. It means that all variables that are used in a task will be processed as global ones when you run the task.
See more information about local variables.
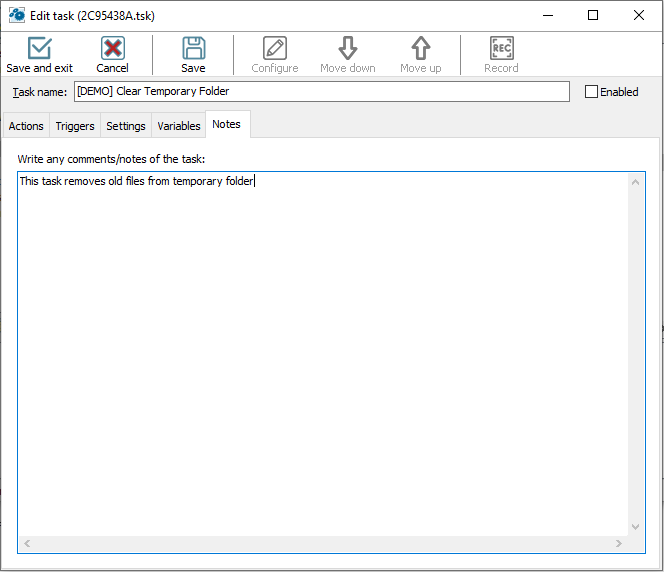
You can write any comment for this task.
![]() Related Topics
Related Topics
Task - Create Shortcut on Desktop